How to Use Camera on Lenovo Laptop Windows 7 | Definitive Guide 2024
As we know Lenovo is the oldest company, Just like other laptops Lenovo has an integrated camera or webcam. These integrated cameras are typically difficult to use. For that reason, we must know how to use camera on Lenovo laptop Windows 7. In every field, we must use a webcam for the convenience of our work. Webcam is essential for the users in video calling and virtual meetups. If you will have a good quality of your webcam then it will give a good impression on your work.
We have chosen Windows 7 because it is user-friendly and easy to set up. It takes really less time than Windows 10. We will conclude all the questions alpha users have about how to use a camera on Lenovo laptop Windows 7. Here you will find how to easily install the package and it will help you in recording your videos and photographs easily.

How to Install Lenovo Computer Camera Drivers?
Here we have simple steps by which you can easily install Lenovo computer camera drivers.
- First of all turn on your laptop and click on the start button, after this click on the control panel.
- After that you will find the option of system security while clicking the control panel option.
- Then just click on the USB imaging devices and gently click on device manager.
- You will find the option of Lenovo visual communication camera inside the USB imaging device option.
- After then click on the action in the menu tab.
- Now uninstall the active window.
- Now again go to the menu tab and then press action again.
- Now click on the option of hardware changes scan.
- Now you can easily close the window for performing the action.
- Now restart the laptop for the result.
Always be sure that your drivers are correctly entered and configured in your laptop because we are attaching the drivers for running our webcam on a Lenovo device. It is comparatively different from digital cameras because laptops need strong drivers for connecting with the systems.
Drivers that you want to use in your laptop must function efficiently, that must be installed in conjunction with your operating system. Because there are many cases in which drivers don’t work efficiently because of the installation problem. Sometimes we need to reinstall or modify our driver by this action, we can make our webcams more smooth and efficient in use.
You May Also Like: Resolve Hulu issues on your laptop: Immediate fix for Hulu not working on your laptop in 2024
How to Turn on the Webcam on a Lenovo Laptop?
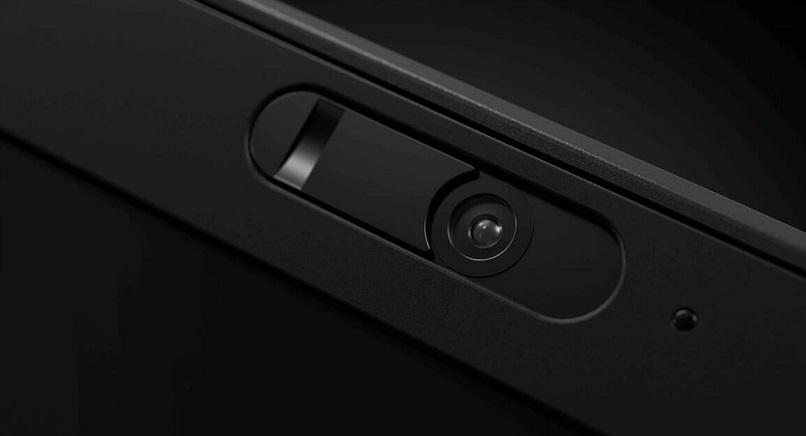
Lenovo ThinkPad laptops Typically have a webcam above the LCD of the laptop. We can easily activate webcam from the computer desktop easily. It is not very difficult but it can be easily done by you, even if you are not technical. But still, you can easily activate it because it is super easy. If you even know how to run a mouse. It can be easily activated with less effort and less time. It is more convenient to use a webcam on a lenovo laptop after activating it by yourself. You will not need any expert for installing a webcam but it can be easily done by you within minutes.
- First of all just click on the start button and turn on your laptop.
- Then you will find the option of all programs click on this.
- Now you will see the option of capture video from device .
- Give your capture video file a name.
- You will see a capture window, now click on start recording. that will automatically start recording video from your webcam.
- Now you have control and you can stop capturing the video by easily clicking stop capture.
How to Use Camera on Lenovo Laptop Windows 7?
If you have Windows 7 and you want to record video on your Lenovo laptop using its webcam then you must follow these steps for the convenient recording of video.
- First of all turn on the laptop by clicking the windows icon and the left of the windows panel.
- Click on all the programs. Then click on the option of video device capture.
- You will see some steps that you need to follow in which firstly turn up the Volume of the microphone and go for the next.
- Now you can save your video with the choice of your folder.
- Choose the best quality and click on the second.
- Now you get to start your recording by clicking the option of start capture.
- After completing the recording you can easily stop by clicking on the stop capture.
- Now you can complete the process by clicking on the finish option.
How to Open the Webcam on a Lenovo?
You will find a range of Lenovo laptops that have cameras just like other laptops. Lenovo webcams can easily be accessed with the start menu. This is the most easy to use GUI method for capturing the videos and photography. There is an option for the user that they can easily edit the captured video using windows movie creator app package. There are different laptops that have different configurations but Lenovo ThinkPad X11 and Lenovo’s new edition has something different in capturing resolution which is 1280p by 720p. You can easily open the webcam on the Lenovo laptop by following these steps.
- Power up your ThinkPad laptop and click on the start button.
- In the start menu you will find the option of all programs. Click on all the programs.
- After clicking all programs click on the video interface capture option.
- Now set the 4th line of the microphone level and click on the next.
- Give your video file a name.
- Save your file in the destination folder.
- Now choose the best quality option and click on the next button.
- Now you can start the recording by clicking the start capture and you can easily stop by clicking the stop capture button.
- After completing the whole process now click on the complete or finish option.
You May Also Like: Discover gaming potential with Dell Inspiron: Is Dell Inspiron good for gaming?
How to fix Lenovo Camera Not Working In Windows 7?
Step 1: change the startup type of disabled:
After starting your laptop just click on the start button and search for the services by typing in the search bar. just right click on the services that show in the result and run this as administrator.
After clicking on the services app you will find the option of Windows Update folder. open (Windows Update folder) .
Now you will have two options in which you can easily change your disabled setting to general tab. In this startup option you can set it to general. now you have the option to stop the button after Selecting disabled.
Press the apply option and then you can close the window now.
Step 2: Delete Data that is stored:
Now open your laptop and look for the C drive. Open that C drive folder and search for the folder named software distribution. After finding that software distribution folder just open it.
After that you will find the directory of datastore. Later then opening the data store delete all the information in the folder.
Step 3 : Delete download folder:
Just like the above step, after starting up the machine. Go for the folder of C drive and open the folder and look for the old download folders. Delete All of them that will lock your window easily.
Step 4: Restart windows 7 update:
For restarting the windows. Go to the menu and start with the typing services in the search bar. Now you will have services Just start them as administrator.
After that, you will find the option of Windows Update. Click on the Windows Update option and open it.
Firstly you will need to adjust the startup option. Open the general tab and set settings to automatic. After selecting the automatic just click on apply and then start . Now you can close the window.
Step 5 : restart the device:
Now after all the process, you have done it. You must start the laptop to fix the error. After restarting your laptop you can easily access the camera that was not working in your Windows 7.
How Do I Know If I Have a Camera on My Computer?
We can easily verify that we have a camera on her laptop or not by following these steps.
- First of all, start your laptop and click on the start button in the menu.
- Now easily type camera in the search bar. For accessing the camera.
- If you have a camera then the camera icon will be shown. But if you can not see the icon of the camera appearing on the screen then just go to the device manager in the start menu.
- You will see the information of the webcam on the screen by double clicking on the imaging devices.
- You can test the integrated microphone by clicking on the system of audio input and output.
How Do I Disable the Camera on My Laptop?
As we can install our camera we can disable the camera on her laptop very easily by following these steps.
- Firstly click on the windows option and then you will see the menu option of menu. Now go to the device manager.
- Now you will see the option of integrated camera just clicks on this. Then click imaging devices that will appear beside.
- Now disable by clicking the disable option.
- Now press yes to complete the process.
- There may be different options because every laptop has different hardware. So just click on the integrated camera option and then you will see imaging devices and then click disable.
You May Also Like: Keep ants away from your laptop: How to get ants out of your laptop
How Do I Test My Webcam on Windows 7?
For testing the webcam on your Lenovo laptop Windows 7, you must follow these steps.
- Wherever you will see the option of HP media smart webcam In your start menu under the option of media smart just click on it.
- Whenever you use the app, you must see any picture taken with the webcam of your laptop.
- Always capture any video for checking the video quality of your laptop’s webcam.
- And if you want to check the photo quality of your webcam then use the option of the snapshot button by which you can easily look for the many pictures at a time and the quality of the picture as well.
- You can update your Windows 7 for testing the webcam.
You May Also Like: Utilize Apple Thunderbolt Bridge functionality: Apple Thunderbolt Bridge: What is it and how to use it?
Conclusion:
In this article we have concluded all the information about how to use a camera on Lenovo Laptop Windows 7. There are some easy steps by which you can easily Turn on the camera on your Lenovo laptop Windows 7. Windows 7 is comparatively easier to use even with the Windows 10.
You can easily open your laptop’s webcam in five steps. Furthermore, we have concluded about. If your laptop’s webcam is not working well. You can easily make it work well by some easy steps. If your Lenovo laptop with Windows 7 is slower with the webcam then you can install some drivers with easy steps for its efficiency of work.
If you have any problem with your laptop webcam then you can solve it by following the steps that are covered in this article.


