Connect an InFocus Projector to a Laptop?
Have you ever wanted to project an image from your laptop onto a screen before you but didn’t feel like clipping your laptop to the projector? Or have you ever wondered how to connect a projector to your laptop but don’t know where to start?
This blog is a guide and checklist for connecting an InFocus Projector to a Laptop. It contains 6 safety tips to help ensure you don’t get hurt while working on your laptop or projector.
How to connect an Infocus Projector to a laptop?
In this guide, I’ll show you how to connect an Infocus Projector to a laptop. We’ll cover all the steps for connecting your laptop and projector together so you can start using them immediately!
Step 1
Set up your projector and laptop in front of the screen. Locate the power cords for each and plug them into the back of the units and the wall outlet.
Turn on your laptop, wait for it to boot up, then open a browser window on your computer (either Chrome or Firefox).
If you have any issues with getting it working correctly, try opening another browser window before trying again, this will help ensure that you’re using an internet connection that isn’t too slow or intermittent.
Step 2
The inputs for your projector are usually located in the back of the unit. They will be labeled with a blue band around them like this:
- Press down on this band to release it from its socket and pull out any wires that might be connected to it.
- Locate your laptop’s input port(s) and move them over to align with their corresponding ports on your projector (if there is more than one).
Step 3
The connector cable is thin and flat, with two connectors on either end. It connects the projector to your laptop and must be used with an HDMI cable (see Step 4) or VGA adapter.
Locate the connector cable. It should have two trapezoid-shaped blue ends with connecting screws on either side. Insert one end into each device.
The ends are interchangeable, so it doesn’t matter which end connects to what; however, you will need to make sure that your PC has been configured correctly for video output before starting this process, as any changes made here may cause corruption during playback if done incorrectly!
Step 4
Turn the computer and projector on. After everything boots up, if you get a “No Signal” message on your screen, press the Fn and F8 buttons on the laptop at the same time. Your image should appear.
Now that you have connected all of your cables correctly make sure there are no errors before installing software onto your projector’s operating system.
Finally: If everything goes well during this step, then congratulations! You now have a working projector-computer connection setup!
Step 5
Suppose you’d like to give your presentation from a laptop. In that case, it’s probably best to connect the projector directly to your computer via a USB cable.
However, if you’d prefer not to have this connection in place during your presentation and instead use a remote control (which is what I did), then here’s how:
- Connect the projector’s HDMI cable to one of the device’s ports on either side of its base.
- Connect another HDMI cable into one of these ports for audio/video output and another for power supply input only (not power consumption).
Step 6
If you are using the projector in various settings, look for one with remote control. This makes adjusting images and channels easier if you sit farther away from the projector.
A good option uses infrared technology to work through walls and other obstructions without needing a line of sight or a direct line between devices.
You May Also Like: Optimize your remote work setup: Best laptops for working remotely
How to build a flashlight projector?
You’ve probably seen a flashlight projector before. It’s basically a regular flashlight, but it projects an image onto whatever surface you direct it.
I like to use them as part of my magic setup because they’re so easy to set up and fun to watch in person.
So how do you build one? It’s actually pretty simple! Here are the steps:
Step 1
The first step is to cover your flashlight’s lens and front end with tissue paper, securing it with rubber bands.
This will create a pocket for your projector lens to sit in so that it doesn’t lose any light as you move around during your presentation.
Step 2
Cut two pieces of cardboard into U shapes with square corners, making them approximately the same size as the flashlight.
Make one piece’s opening wide enough to hold a slide and the other’s opening slightly smaller.
Poke holes into both pieces at various places along their length so that you can thread them through your slide projector’s lens when you’re ready to use them.
Step 3
To build the frame and hold your slides, you’ll need two pieces of cardboard. The first is a larger piece that will form the main body of your projector.
The second is a smaller one that will hold all your slides (the ones you want to be projected onto).
To glue them back to back, use construction paper or tape as needed until they’re secure enough.
Then put this larger frame inside another cardboard piece, so there’s room for your flashlight’s cover shield and handle without hitting anything else when used as a projector!
Step 4
The next step is inserting a slide into the frame so it is held directly in front of your flashlight. This will be used to create movement and produce shadows on your wall.
Grab a piece of paper or something similar that you can use as a template for this purpose (a cardboard box works great). Make sure it’s at least 8″ x 12″, but larger would be even better.
Once you’ve got this ready, take your flashlight and turn off all unnecessary lights around you until only one bulb remains lit up on top of your projector nozzle head section (the part where you put batteries).
Step 5
Now that you have your flashlight and a magnifying glass or fresnel lens, it’s time to start.
Place the light in front of the lens and point it at a blank wall. Turn on the light with it shining through both pieces so you can project an image onto whatever surface is in front of them (the wall).
Adjust their positions until you’re happy with how things look.
What are the safety tips to consider when setting up an Infocus projector?
Setting up an Infocus projector is a piece of cake. You can easily connect it to your laptop or TV and start using it in no time.
But have you ever thought about the safety tips that need to be taken care of while setting up your new projector?
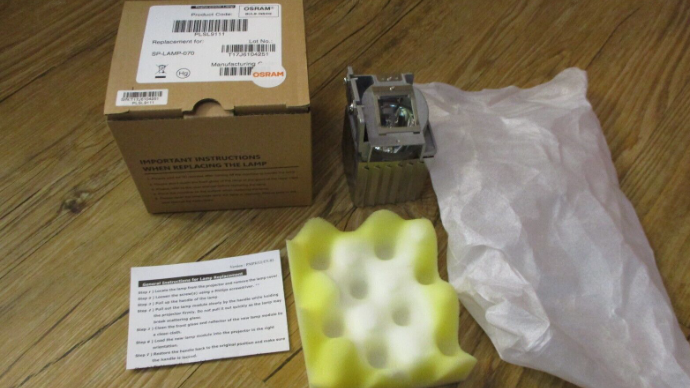
Open the packing of the box
To open the box, you need to use a knife.
Make sure to keep all packing materials for future use.
For example, if there are instructions on how to set up your projector and how much light it needs, put them in a safe place so they will be recovered when you move in the future or want to change something else about your projector later on.
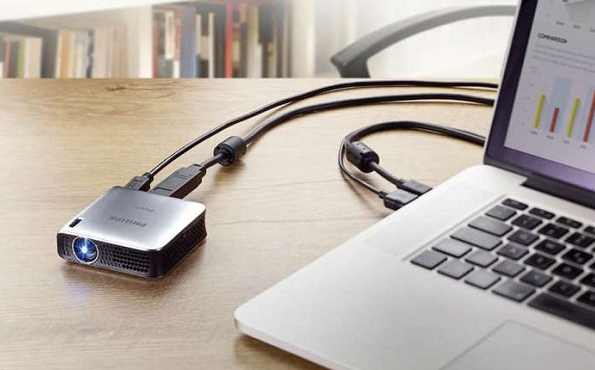
Make a fine connection
After you have set up your projector, you need to make sure that everything is connected properly. The first thing to check is the power source.
Suppose there are any loose cables or connections around the back of the projector, and they are not in contact with an electrical outlet. In that case, these will cause problems with picture quality.
Ensure all connections are secure by checking them with a voltmeter before connecting.
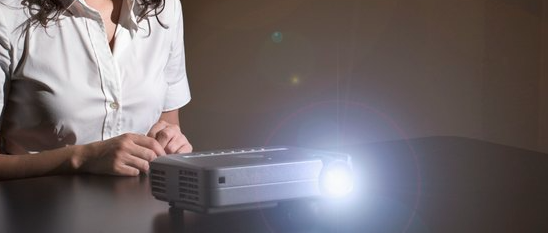
Turn on projector
Turn on your projector. Ensure there’s power in the socket; if necessary, check for a new cable or adapter.
Check the input source on your TV or monitor to ensure it’s compatible with the projector. Some projectors have different inputs (DVD player, DVI-D port) than others; this may affect how they connect and whether they’ll work together properly.
If you don’t see anything happening after turning on your projector, check these other things:
Adjust the image
The remote control is a great way to adjust your projector’s image. It has buttons for brightness, contrast, and other settings that make the picture brighter or darker, depending on how you want it.
If you’re using a projector at home, try turning up the brightness so it’s more visible across the room.
Suppose you want more control over how much light comes through your screen and don’t mind spending money on extra equipment.
In that case, you can also use an infrared remote control instead of just pressing buttons on your television or computer screen (which will let you change only brightness).
Way to use the menu
The menu is a great way to adjust the image. You can do this by using the remote control, projector, and screen buttons or even pressing them yourself.
Suppose you’re unsure which button to press or how much pressure you need to apply when pushing down on it. In that case, there’s plenty of online information about what each button does and how it works best.
Turn off the projector
Turn off the projector. This can be done in several ways, but the easiest is simply unplugging it from power and disconnecting all cables.
If you have multiple projectors, repeat this process for each one until you’re sure that no one will be harmed by your actions.
Why won’t my projector show my laptop screen?
The answer is that you need to set up the projector correctly. If you use a laptop, you’ll want to make sure that the projector’s image is horizontal (or “landscape”) and not vertical (or “portrait”).
To do this, go into your laptop’s settings and look for options like “Display” or “Screen Resolution.” You may be able to adjust these settings to get a better image on your screen.
What Function Key Connects The Laptop To The Projector?
The function key connects the laptop to the projector is the F1 key.
The F1 key is used to switch between different input devices, such as projectors or monitors. It also toggles between laptop inputs, such as USB and HDMI ports.
Frequently Asked Questions
How do I connect my projector to my laptop?
You can connect your projector to your laptop using a VGA cable, which you can purchase at any office supply store or online. The VGA port is located on the back side of the projector and will have an analog video signal coming out of it. You’ll need to use a standard-size VGA cable about two feet long. You’ll also need a converter cable to connect your VGA to the computer’s USB port.
How do I connect my InFocus projector to my laptop wirelessly?
You can wirelessly connect your InFocus projector to your laptop using a wireless adapter. The adapter plugs into the projector and then connects to your laptop. It’s as simple as that!
How do I connect my laptop to my InFocus projector with HDMI?
You’ll need to use an HDMI cable to connect your laptop to your InFocus projector with HDMI. Make sure you’re using the right cable type for your laptop and projector, and ensure that the cable’s end is the gold-colored side. You can also use a wireless HDMI transmitter if you have an older InFocus projector model with no HDMI port.
Conclusion
Be very cautious once you connect your laptop projector. Above all, be slow, steady, and gentle when plugging in and unplugging from the HDMI or VGA port.
The nature of the movement may cause a static shock to the device, which can damage or even fry your electronics (laptops, computers, or other compatible machines).
Be aware that connecting your laptop to a projector is a physical process.